A bottle of light
What to do on the darkest day of the year (sunrise 8:43, sunset 14:48 in Stockholm) with an annoyingly empty bottle of my favourite gin?
The idea is far from original, but a lot of fun. Today we are making a lamp!
Main ingredients:
- Empty bottle with cork
- Discarded, old USB phone charger (output: 5V 550mA)
- High-power (3W) white LED (6000K) mounted on a sheet of metal
- Small heatsink (14 x 14mm) with some thermal paste
- Current-limiting resistors (two pieces of 1.5Ω 0.6W)
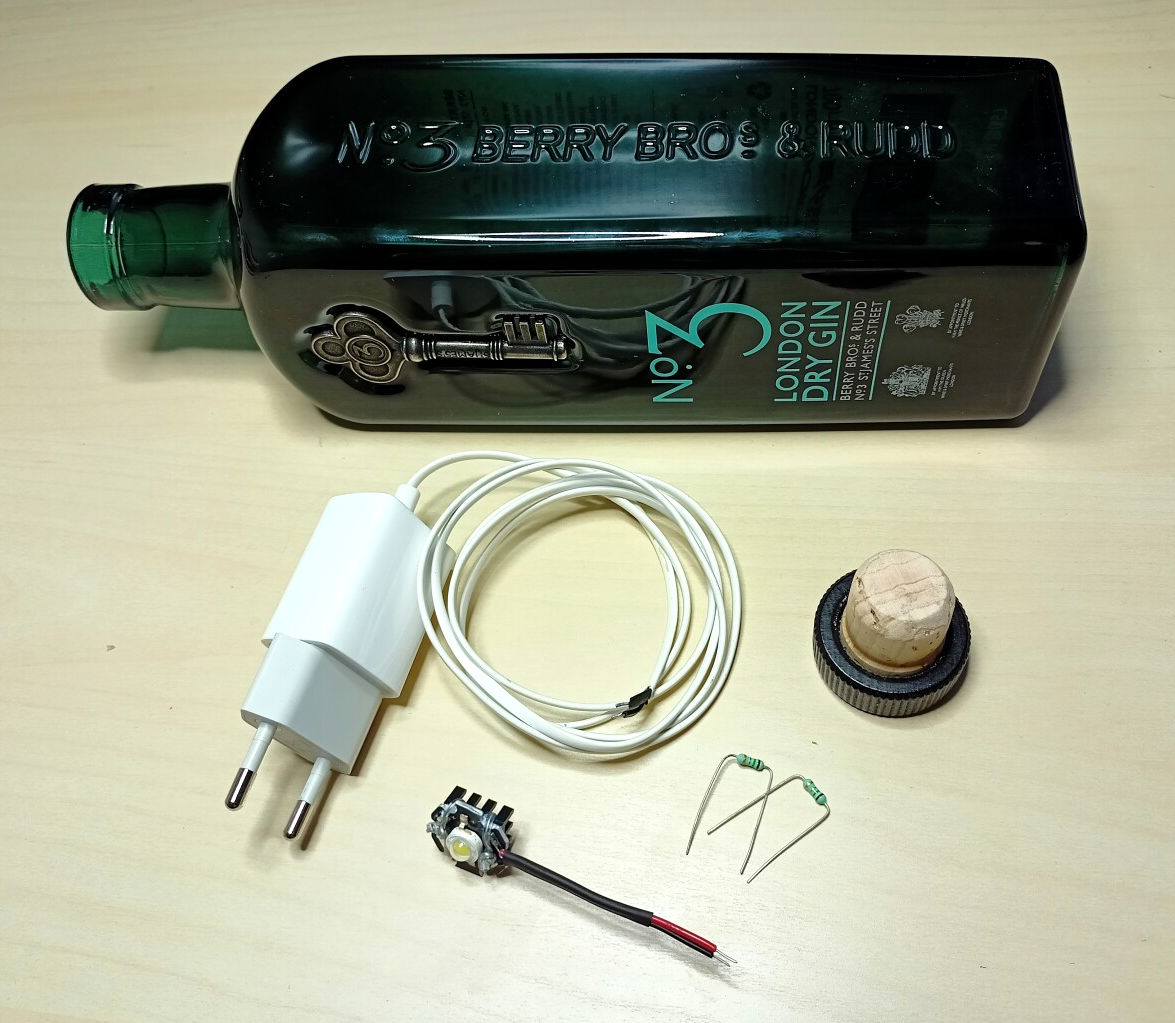
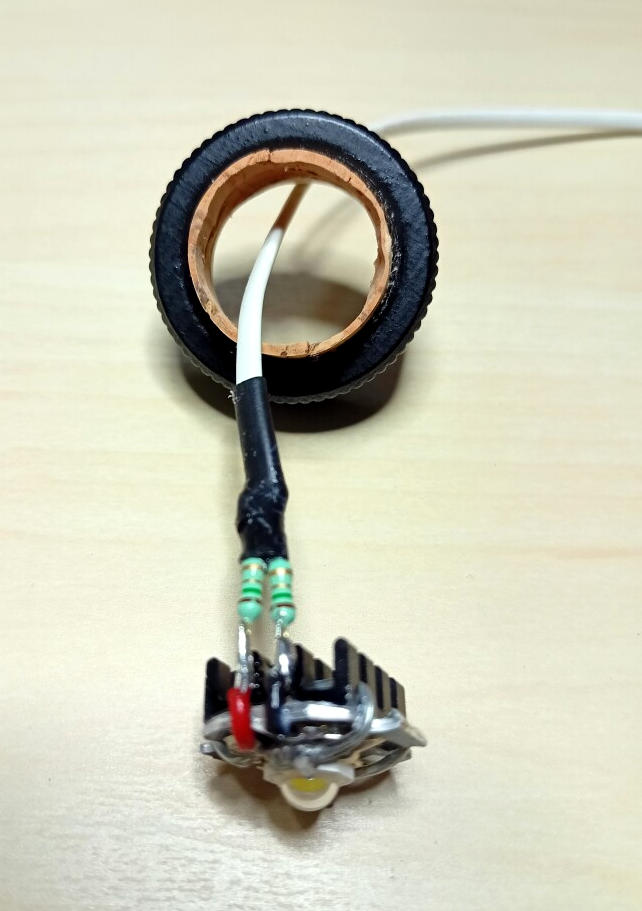
Ingredients (click to enlarge)
We will need soldering equipment, a dremel tool (small hand-held drill) and various other manual tools and materials such as shrink-tubes, some tinfoil, etc.
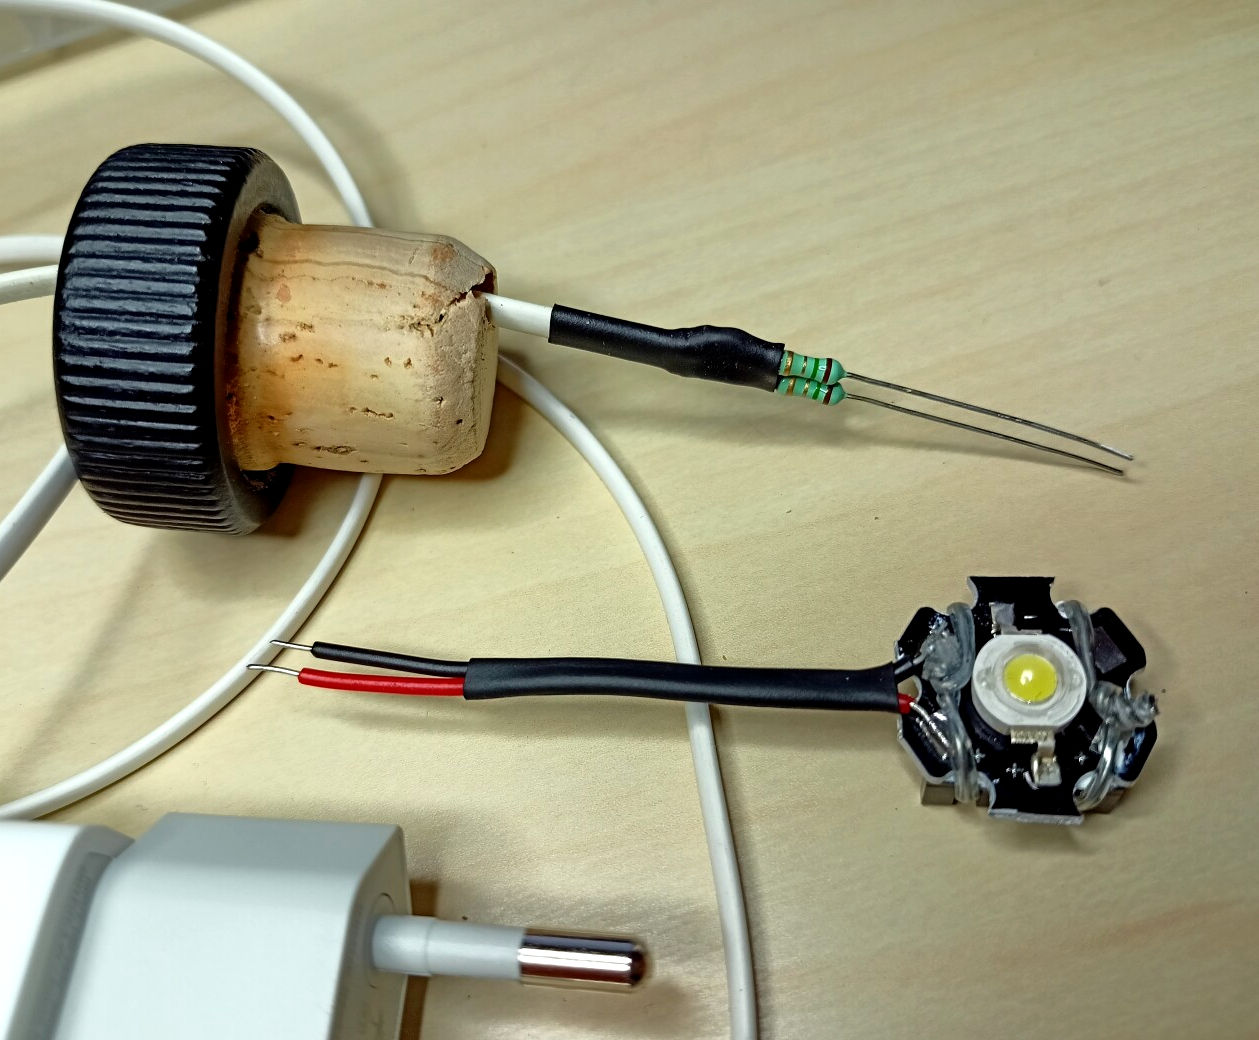
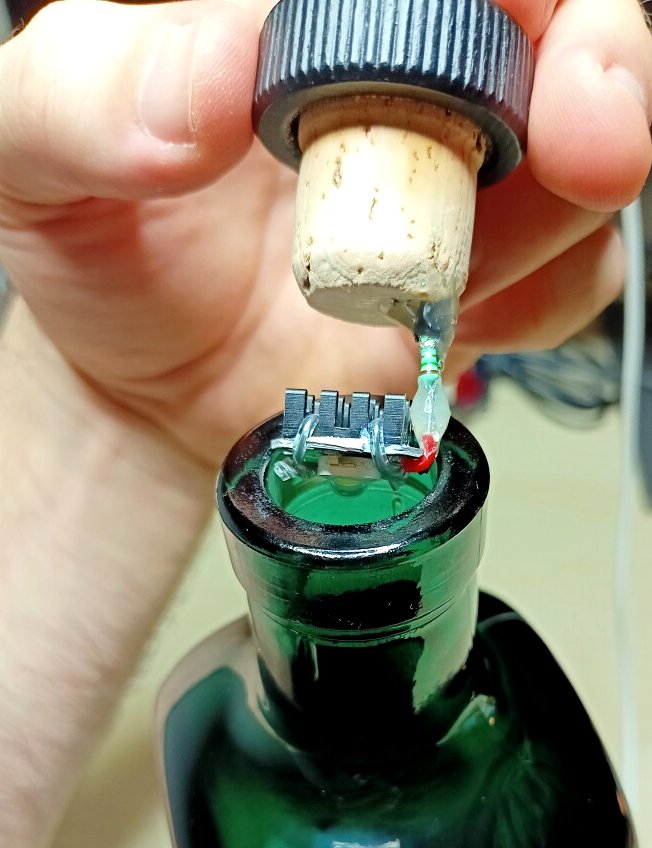
As seen above, I have already prepared the LED by soldering a pair of short wires to it (neatly shrink-tubed) and mounted it on a small heatsink originally intended for BGA chips (fastened with two tightly wrapped insulated wires) with a bit of thermal paste in between.
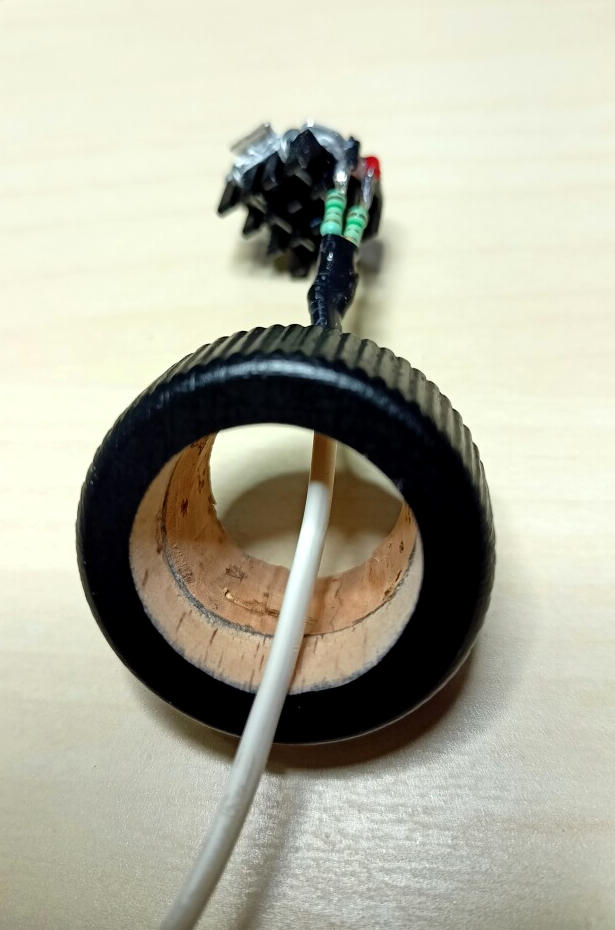
I drilled a hole straight through the cork close to the edge, large enough to pass the charger cable through. The resistors were soldered to the cable ends, the soldered leads individually shrink-tubed for insulation, then both shrink-tubed in a bundle for durability, but leaving the resistor bodies clear to allow for heat dissipation. Then came a bit of breadboard testing and measurements to make sure the circuit actually works.
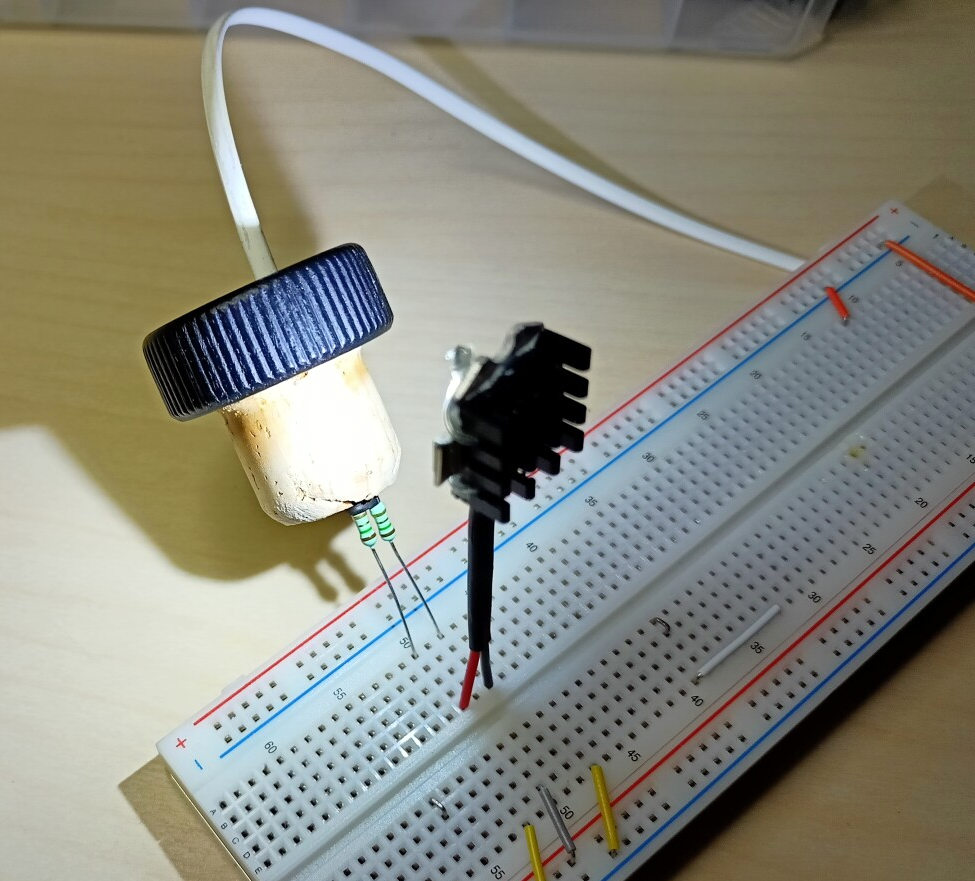
Cable through the cork; testing on breadboard (click to enlarge)
I measured 4.79V between the ends of the supply cable and 3.05V on the LED connections. This works out to a current of 580mA, with 1.8W of power into the LED (barely 60% of its rating, so heatsink-wise we should be fine) and 0.5W dissipated by each resistor (well within their 0.6W rating). Of course, I could have used a single resistor (somewhere between 2Ω and 3Ω) but these were the best match from my drawers. The charger is operating at capacity; we’ll see how it holds up.
Now it’s just a matter of assembling the bottle. On the right picture below, notice that I used some hot glue to fasten the shrink-tubed cable into the cork hole, and to add some insulation to the bare resistor leads soldered to the LED (wishing to avoid a short circuit). The usage of hot glue will later become… significant.
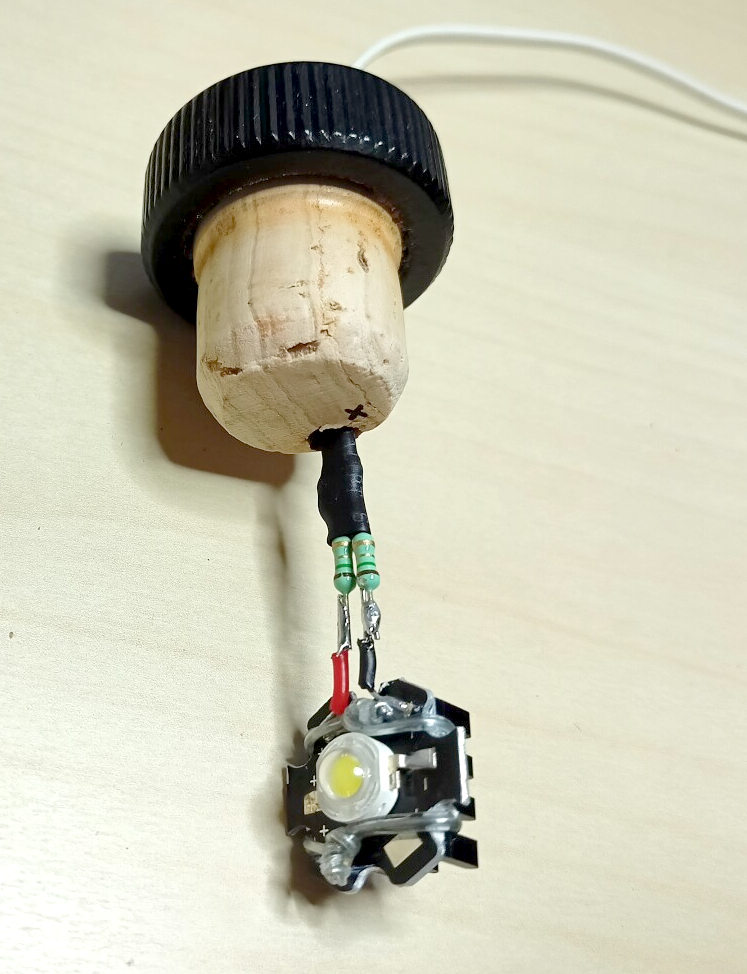
Assembly of initial version (click to enlarge)
The first results were encouraging: the lamp cast pretty lights placed on the floor or on a shelf, and came handy as a (bulky) lightsaber:
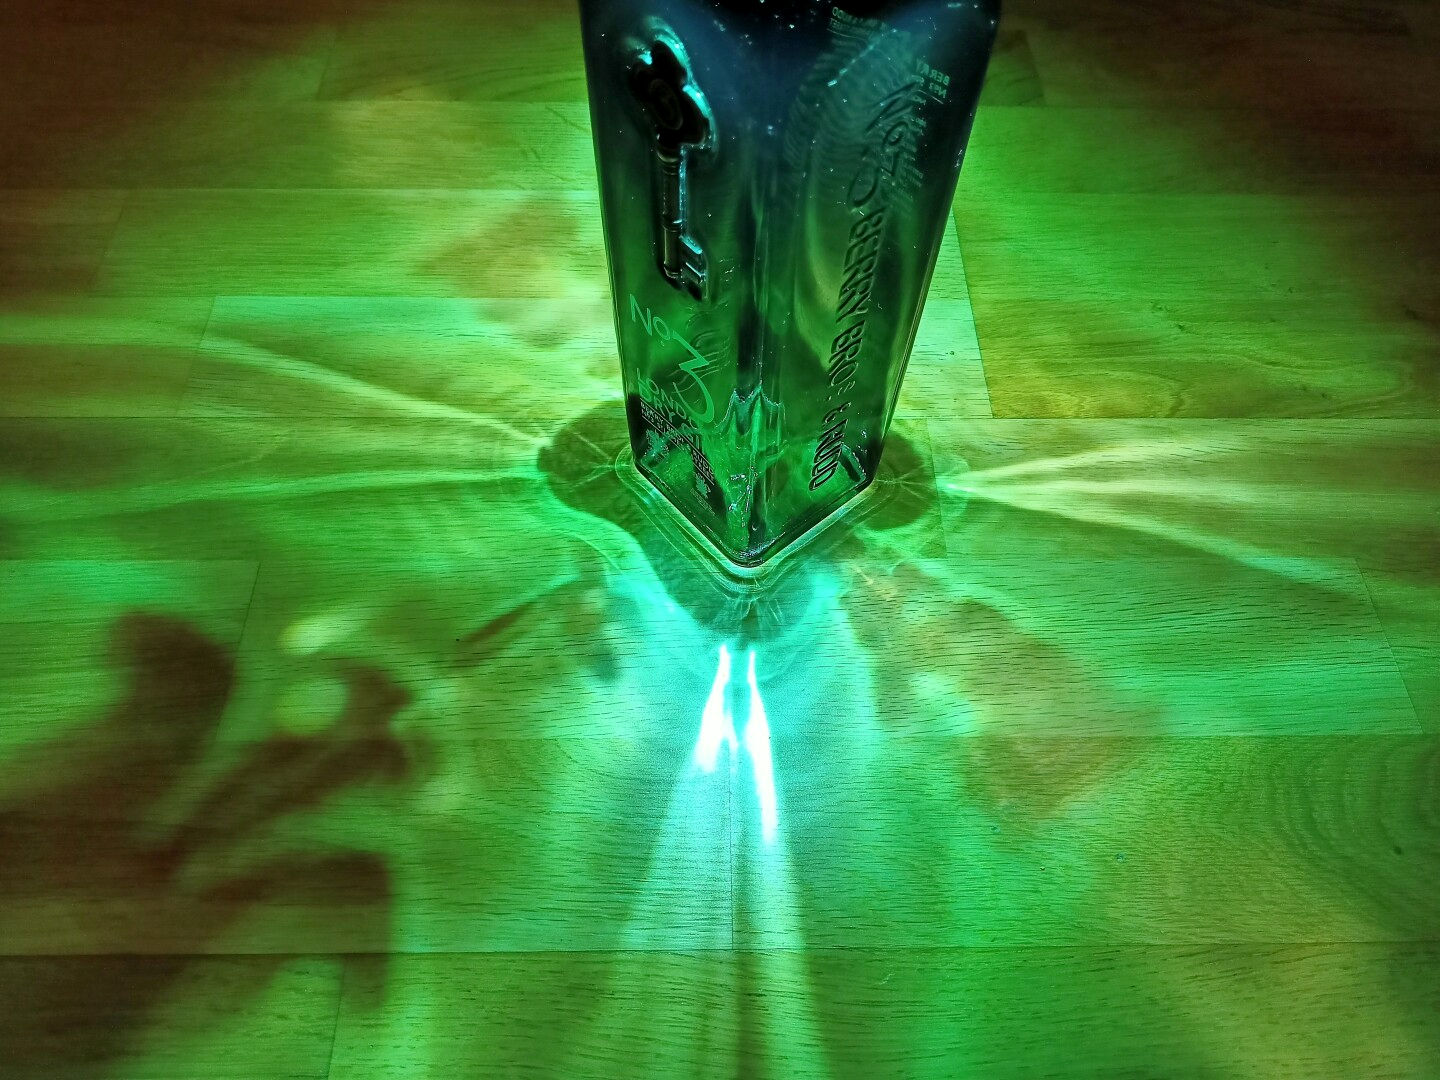
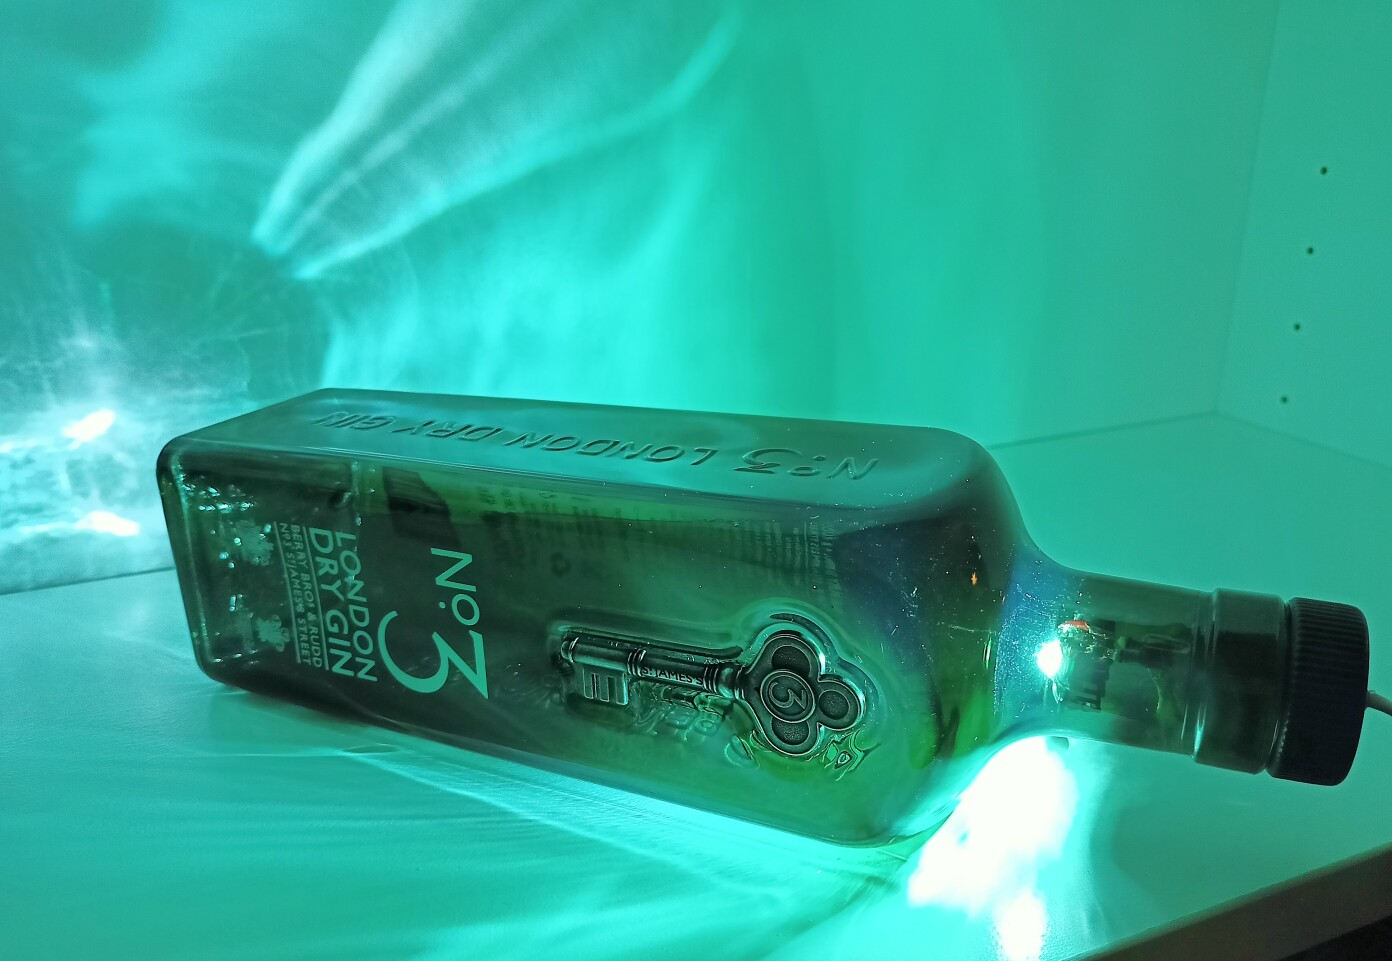
First tests (click to enlarge)
Did I mention that I used some hot glue?
The total dissipated power within the bottle is somewhere around 2.5W. Clearly, I have grossly underestimated the amount of heat that would generate within the tightly sealed bottle. It did not take very long before I noticed that the cable had become loose in the hot glue, which was now flowing and dripping downwards… what an epic failure!
Kids, remember the lesson: no hot glue near parts that become hot during operation!
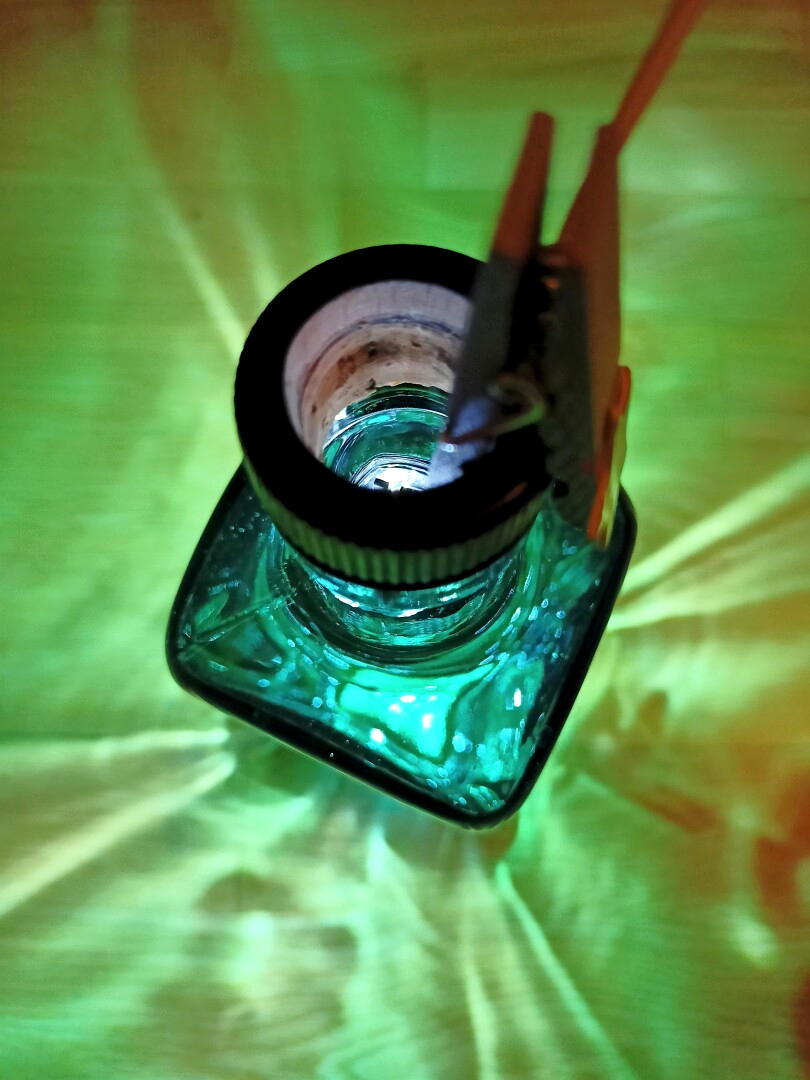
Time for a redesign, or at least some adjustment. Most of the hot glue dripped down on its own, and the rest I could soak up and wipe off with a paper tissue. The obvious thing to do was to open up the bottle for some ventilation and combat the heat build-up. I cut down the length of the cork so just a couple millimeters would remain (enough to have it plugged into the bottle opening) and drilled through the rest, removing most of the material. It really put my dremel skills to the test as the cork itself was extremely soft and easy to cut, but the top (painted black) was of much harder wood. I had to remove almost all the cork to get an opening large enough for the LED’s base plate to get through – only a very thin wall of cork would remain. I also had to be careful not to hurt the cable trapped in the hole. Still, the result turned out to be pretty good. Photographed from both ends of the hole:
A hole in the cork (click to enlarge)
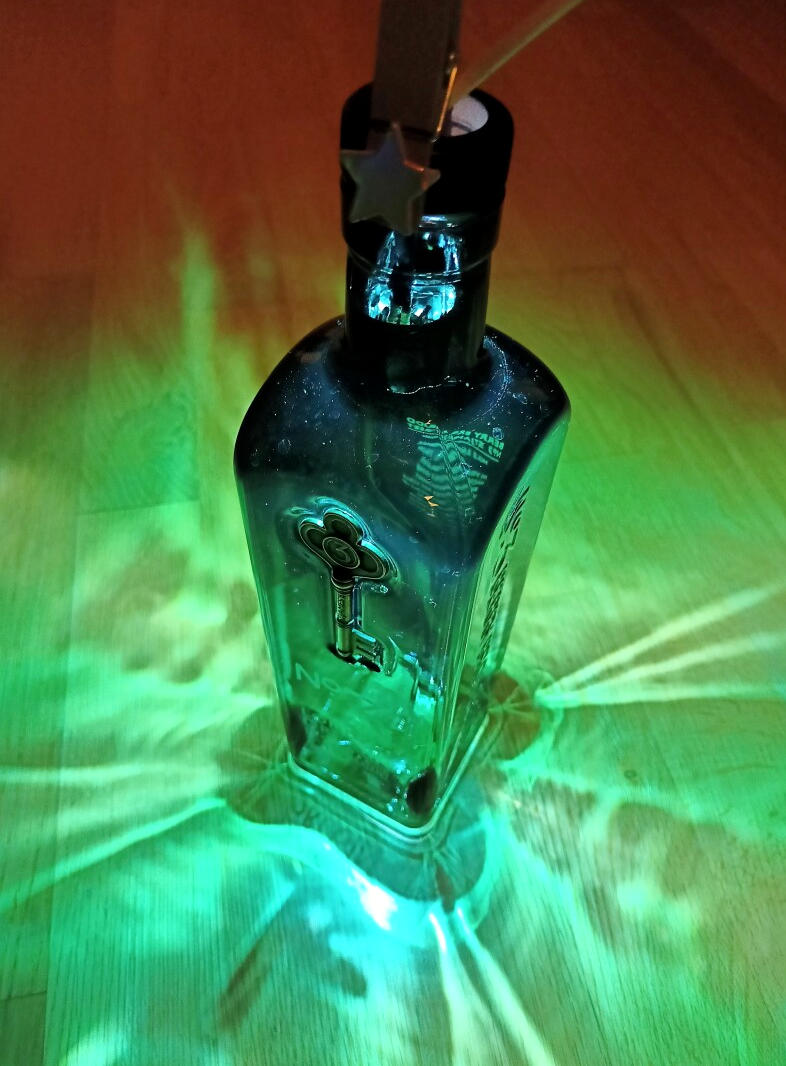
My plan was to seat the LED within the cork, with its heatsink aligned to the top edge, but I realized that for the light to really enter the glass, the LED needs to be lowered into the neck, about the same place as before the cork was drilled. After some searching around, I used a small-ish clip to hold the cable in place, setting the cable length so the light source would land in the desired position. An advantage of the clip is easy adjustability.
Now the lamp seemed to function perfectly and without any sign of overheating (the glass neck became slightly warm after a while). As a final nuisance, it turned out that the LED radiates too much light sideways, its direct light masking the faint glow of the glass body when looking at it from the side. To patch this bug, I folded some tinfoil into a ring around the LED so it would block the line of sight to the LED from the sides, and reflect the light downwards (hopefully) into the bottle.
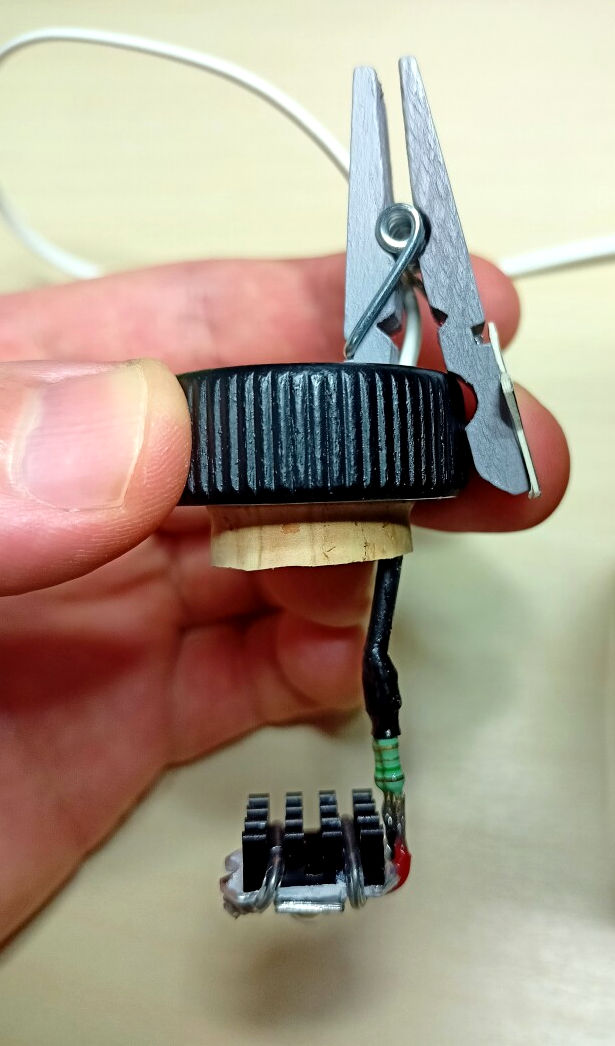
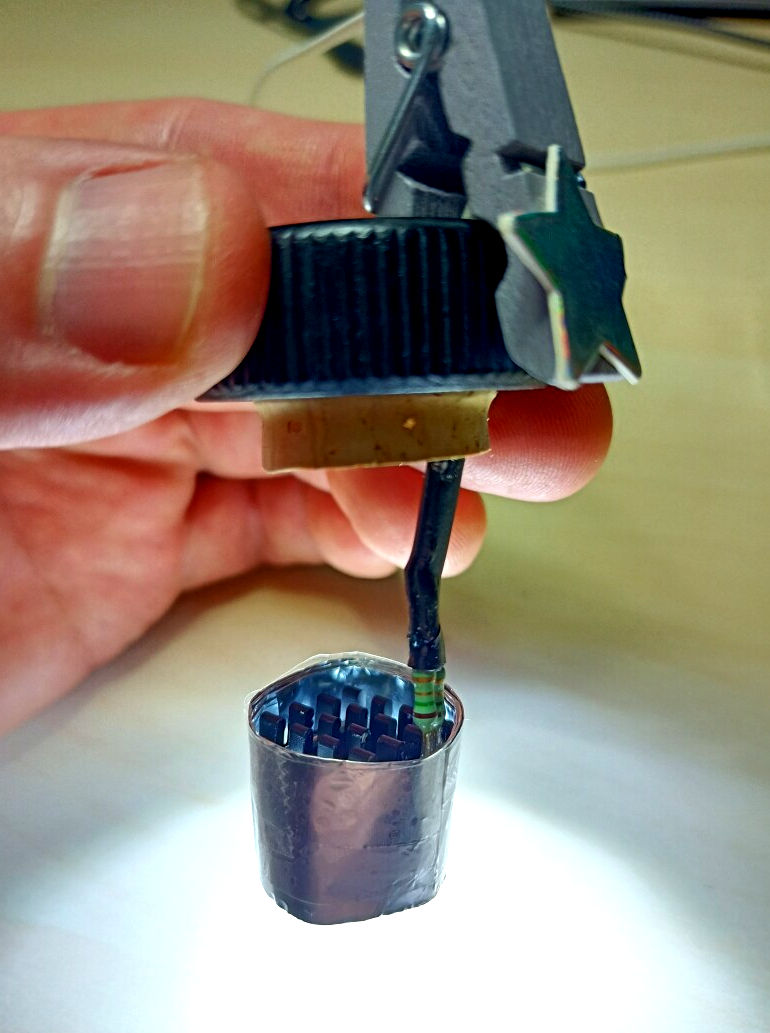
Cable clip and tinfoil reflector (click to enlarge)
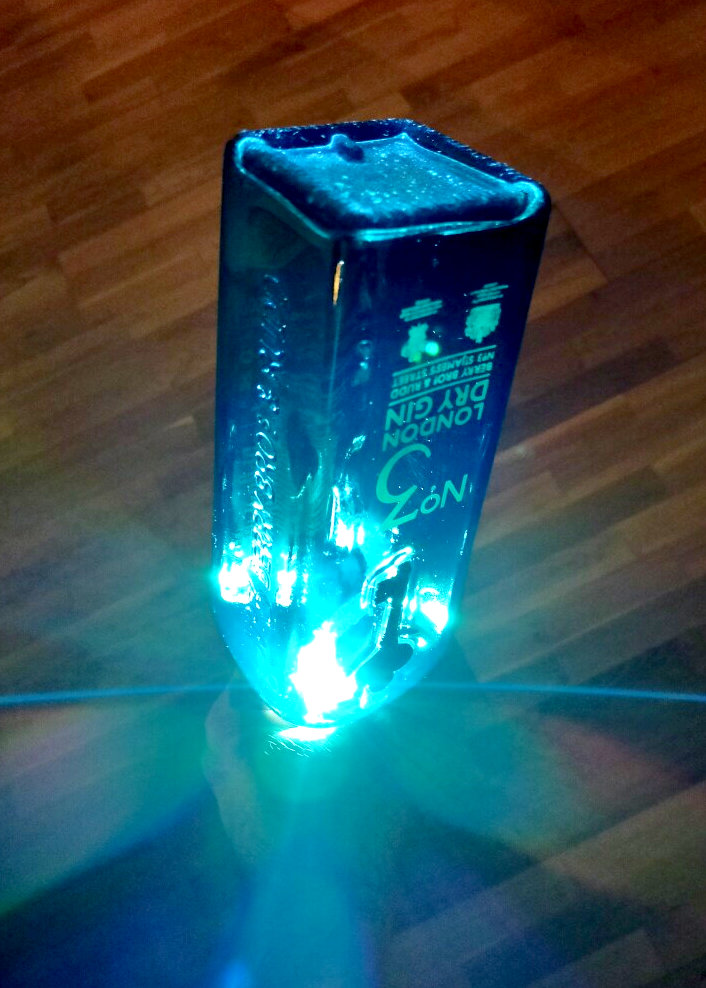
The end result, as photographed on the wooden floor:
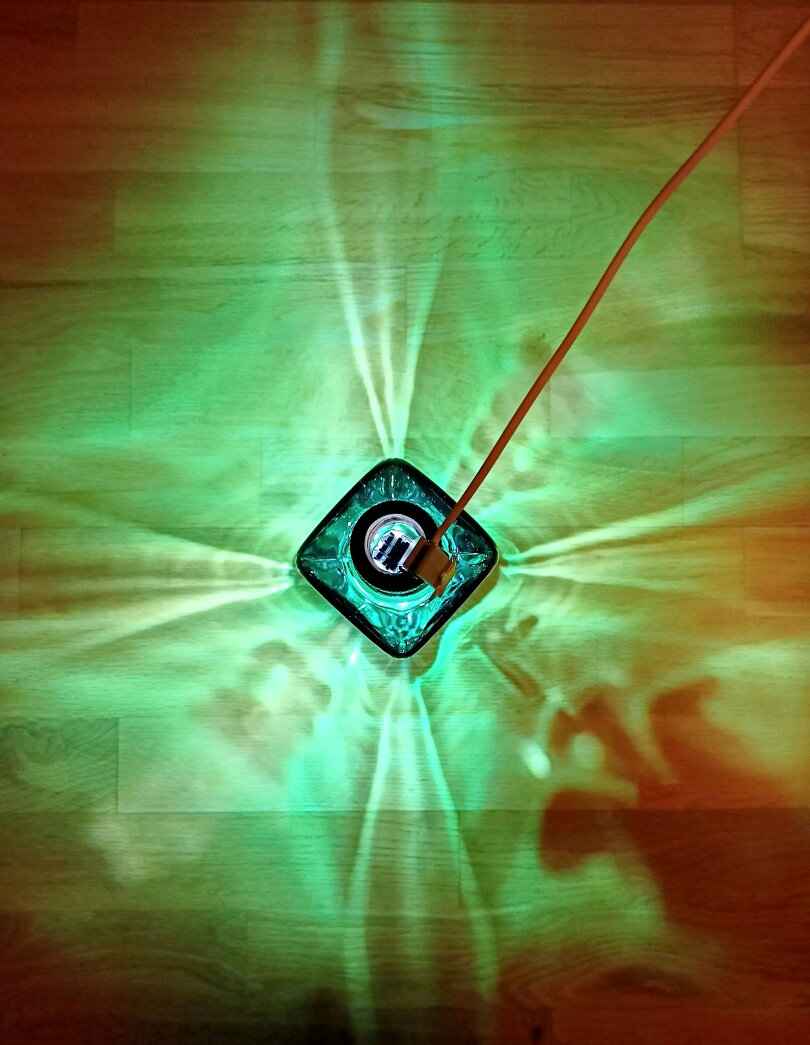
A bottle of light (click to enlarge)
This will be a nice addition to our Christmas lights!